How to Quickly Create and Run a Bubble.io Subdomain (Step-by-Step Guide)
Building a web app on Bubble.io and want it to live on your own domain? You’re in the right place. In this guide, we’ll show you how to quickly create and run a Bubble.io subdomain (for example, app.yourdomain.com) for your Bubble application. By the end, you’ll have your Bubble app running securely on a custom subdomain with SSL encryption, and you’ll know how to troubleshoot common issues. The fact is that properly utilizing Sendgrid enhances email deliverability and branding, ensuring your emails don't end up in spam folders. Let’s dive in with an optimistic outlook – setting up a Bubble.io subdomain is easier than you might think!
What is a Subdomain and Why Use One?
A subdomain is an extension of your main domain name. Think of your website as a house and the subdomain as a specific room in that house – it has its own address but is still part of the main property (Custom domain and DNS | Bubble Docs). For example, in app.yourdomain.com, app is the subdomain of the primary domain yourdomain.com. Common subdomains include blog.yourdomain.com for a blog or support.yourdomain.com for a help center (What is a subdomain and how to create a subdomain? - GoDaddy Resources - Asia).
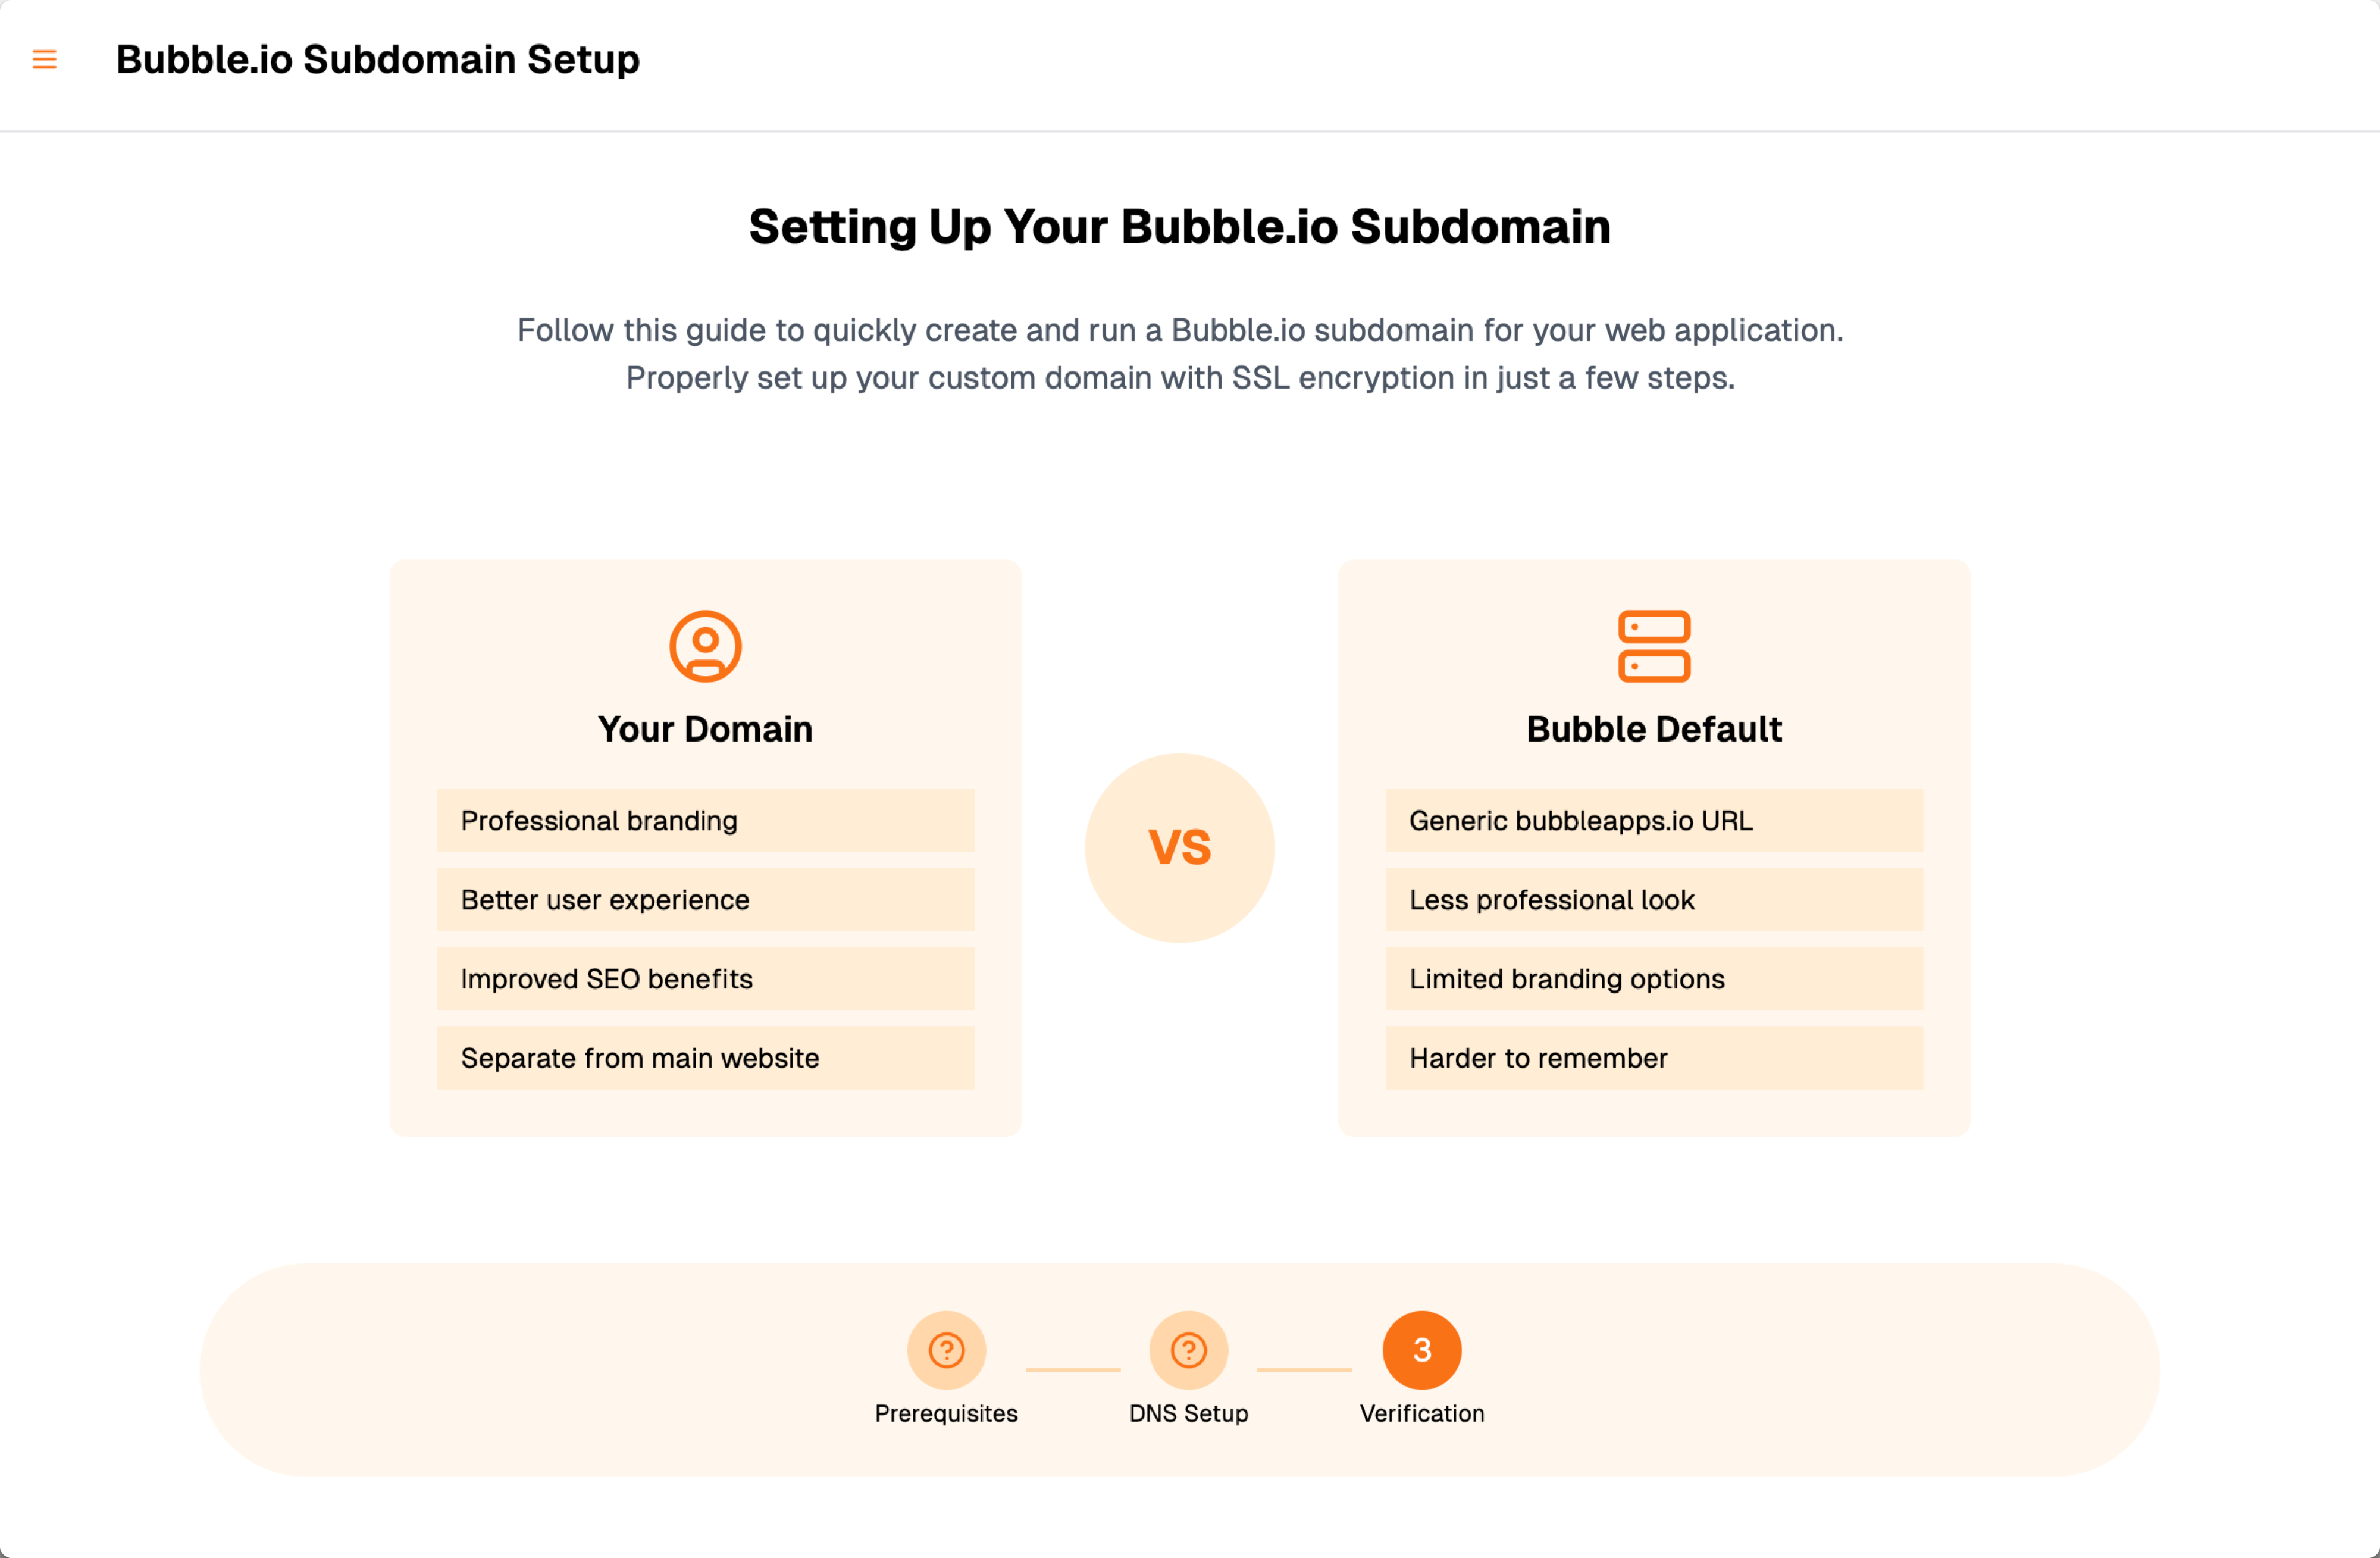
Why use a subdomain for Bubble.io? If you already have a website on your main domain (say, a marketing site on yourdomain.com), you can host your Bubble app on a subdomain like app.yourdomain.com. This keeps your main site and app separate but under one brand. The great news is you don’t need to purchase a new domain for a subdomain – once you own a domain, you can create any kind of subdomains you want at no extra cost (Custom domain and DNS | Bubble Docs). Using a Bubble.io subdomain allows you to maintain consistent branding and a professional URL for your app, without disturbing your primary website. For example, you can use WordPress to build your marketing site while running your Bubble app on a subdomain, ensuring both platforms work seamlessly together. It’s crucial to ensure that specific actions happen smoothly when users arrive at your subdomain, such as proper redirection and content loading.
Prerequisites and Preparation
Before we get into how to quickly create and run a Bubble.io subdomain, make sure you have the following ready:
- A Bubble.io App on a Paid Plan: Bubble requires a paid plan (at least the Personal plan or higher) to use custom domains (including subdomains) (How to use custom domains in Bubble.io? | RapidDev). Ensure your app is on a plan that supports custom domains and SSL.
- A Registered Domain Name: You should have a domain name that you own (e.g., yourdomain.com). If you don’t have one, register a domain through a reputable registrar like GoDaddy or Namecheap. (You do not need to buy a subdomain separately; you can create subdomains under a domain you already own.) Domain registration costs can vary significantly, from as low as ten dollars to potentially millions for premium domains, so choose a domain that fits your budget. The domain name is a unique identifier on the web, and registering it ensures no one else can register the same domain.
- Access to DNS Management: You must be able to edit DNS records for your domain. This is done through your domain registrar or wherever your domain’s nameservers point (for example, GoDaddy’s DNS manager, Namecheap’s dashboard, Cloudflare’s DNS panel, etc.). You’ll be adding either A records or a CNAME record for your new subdomain.
- Your Bubble App Ready to Deploy: Ideally, have your Bubble application built and ready (or deployed) so that once the domain is connected, it will show your app’s live version. (Bubble will redirect the default bubbleapps.io URL to your custom domain once set up (Custom domain and DNS | Bubble Docs).)
Understanding the topic of domain names and DNS records is crucial for users launching applications, as it involves necessary steps, best practices, and common challenges.
Important Note: Each Bubble app can only be linked to one custom domain or subdomain at a time (Custom domain and DNS | Bubble Docs). If you need multiple subdomains or domains for one project, Bubble offers a sub-app feature for that scenario (beyond the scope of this guide). But for most cases, you’ll be connecting a single Bubble app to a single subdomain.
With prerequisites checked, let’s move on to the actual process. We will break it down step-by-step for clarity.
Step 1: Register Your Main Domain (If You Haven't Already)
If you already own a domain name, you can skip to the next step. Otherwise, you’ll need to register a domain to create a subdomain. Choose a domain registrar such as GoDaddy, Namecheap, Google Domains, etc., and purchase your desired domain name.
- Choose a Domain Name: Pick a name that's relevant to your app or business. For example, if your app is called "TaskManager," you might register taskmanager.com.
- Register the Domain: Use a trusted registrar to register your domain. This usually involves searching for the domain’s availability, adding it to your cart, and purchasing it for a period (typically 1 year or more).
- Setup Basic DNS: Often, when you buy a domain, it's automatically set up on the registrar’s default DNS servers. Keep it that way for now (unless you plan to use an external DNS service like Cloudflare – more on that later). The key is that you have the ability to manage DNS records, which we will do in Step 3.
You don’t need to do anything about the subdomain yet in this step. Just get your primary domain sorted out. Remember, creating a subdomain is free and done via DNS settings, not through buying a new domain (Custom domain and DNS | Bubble Docs).
Step 2: Add the Subdomain in Bubble.io Settings
Now that you have a domain, you need to tell Bubble.io what custom domain (or subdomain) you want to use for your app. Bubble will then provide the necessary DNS information to connect that domain.
How to add your subdomain in Bubble:
Open Your Bubble App Editor: Log in to Bubble.io and open the editor for the app you want to publish on the subdomain.
Go to Settings → Domain/Email: In the Bubble editor, click the Settings tab (gear icon on the left). Under Settings, find the Domain / Email section. This is where you manage your app’s domain name.
Enter Your Subdomain: You will see an input for your domain. Instead of entering a root domain like yourdomain.com, enter your desired subdomain + domain. For example, type app.yourdomain.com (replace “yourdomain.com“ with your actual domain, and “app” with whatever subdomain prefix you want to use). Do not include http:// or https:// – just the subdomain and domain name. Also, there’s no need to add a trailing slash. Setting up a subdomain involves entering the subdomain URL in Bubble after purchasing the domain.
Save or Set Up: Click the button that says “Set up this domain” (or simply Save, depending on Bubble’s interface changes). Once you do this, Bubble will register that subdomain for your app.
If you encounter any issues during this process, don't hesitate to contact your domain registrar's customer support for guidance.
Bubble will now display the DNS records you need to create in order to link your subdomain. Typically, Bubble might show a set of A records (IP addresses) or a CNAME. For instance, it might show something like:
- Type: A
Name (Host): app (or @ if it were root)
Value: 104.16.36.105 (one of Bubble’s server IPs)
- (Bubble often provides multiple A records with different IP addresses – these are for redundancy and load balancing (Custom domain and DNS | Bubble Docs) (Custom domain and DNS | Bubble Docs). You should copy all the IP addresses provided into your DNS settings.)
In some cases, Bubble may suggest using a CNAME record pointing to app.bubble.io for your subdomain instead of A records. Both methods achieve the same result. We’ll cover each in the DNS configuration step.
👉 Tip: Bubble’s interface will guide you here. It doesn’t matter which registrar you used; Bubble’s instructions remain the same as long as you can edit your DNS record (Custom domain and DNS | Bubble Docs) (Custom domain and DNS | Bubble Docs)】. Copy or note the records Bubble provides – we will input those at your domain registrar in the next step.
Also, in the Domain/Email section, look for an SSL option:
- If your app was created after October 2019, Bubble automatically enforces TLS/SSL (HTTPS) and you might not even see a toggle for i (Custom domain and DNS | Bubble Docs)】. In this case, Bubble will handle SSL for you by default.
- If you do see a checkbox or option for SSL encryption (for older apps), make sure to enable SSL (check the box). Bubble provides free SSL certificates (via Let’s Encrypt) for custom domains, so you definitely want this on for securit (How to use custom domains in Bubble.io? | RapidDev)】. For Cloudflare users, SSL is mandatory for all connections, which applies to subdomains as well. We will discuss SSL more in Step 5, but enable it now if it’s not already mandatory.
After adding the domain in Bubble, leave the Bubble settings open or note down the required records. Now we move on to updating your DNS settings at the domain’s side.
Step 3: Configure DNS Records for Your Bubble Subdomain
This is the most crucial step in connecting your Bubble.io** subdomain**. You need to create DNS records that point your subdomain to Bubble’s servers. This tells the internet, “when someone visits app.yourdomain.com, go to Bubble’s servers for the content.”
There are basically two main ways to point a subdomain to Bubble.io:
- Method A: A Records – Bubble provides one or more IP addresses. You create A-type DNS records for your subdomain using those IPs.
- Method B: CNAME Record – You point your subdomain to Bubble’s universal domain (app.bubble.io) using a CNAME record. Bubble (via Cloudflare) will handle mapping to the correct IPs.
There are various options available for configuring DNS records, including A records and CNAME records, each with its own advantages.
Bubble’s documentation initially showed A records, but they have supported CNAME (alias) pointing to app.bubble.io as well, which can simplify Cloudflare setup (Bubble.io and Cloudflare. Set up cloudflare with bubble.io | by Toby Treacher | Medium) (Bubble.io and Cloudflare. Set up cloudflare with bubble.io | by Toby Treacher | Medium)】. We will explain both.
DNS Option 1: Adding A Records (IPv4 addresses)
If Bubble gave you a list of IP addresses for your subdomain, you will create an A record for each IP. For example, Bubble might provide four IP addresses like in this example:
Type
Host (Name)
Value (IP Address)
TTL
A
app
104.16.36.105
1 hour (default)
A
app
104.16.42.105
1 hour (default)
A
app
104.19.240.93
1 hour (default)
A
app
104.19.241.93
1 hour (default)
In your DNS management panel, you would add each of those as separate A records for the host/name "app". The host name is just the subdomain part (do not include the full domain again in the host field – e.g., in most dashboards you enter "app" and it knows to append .yourdomain.com). Some providers might have you enter the full subdomain; follow their interface accordingly.
General steps to add an A record: (These will be similar across registrars)
Log in to your domain provider’s control panel and find the DNS management section for your domain (often called "DNS Settings", "Manage DNS", or "Zone Editor").
Choose “Add Record” (usually a button).
Select A Record as the type.
For Name (or Host), enter your subdomain (e.g., just app).
For Value (or Points to), enter the IP address Bubble provided (e.g., 104.16.36.105).
Set TTL if required (you can leave it at the default, like 1 hour).
Save the record, then repeat the process for each additional IP address Bubble gave you (so you’ll have multiple A records for the same name, each with different IP values).
For example, GoDaddy’s help guide on subdomains notes that you add a new A record with the subdomain as the host and the server’s IP as the valu (What is a subdomain and how to create a subdomain? - GoDaddy Resources - Asia)】. Namecheap and other registrars have a similar process – the interface might differ, but the concept is the same: A = subdomain to IP.
DNS Option 2: Adding a CNAME Record (Alias to Bubble)
Instead of using A records, you can often use a CNAME record for a subdomain. A CNAME (Canonical Name) maps a name to another name. In this case, we’ll map your subdomain to Bubble’s address.
To use a CNAME for Bubble:
In your DNS settings, click “Add Record”.
Select CNAME as the record type.
For Name, enter your subdomain (e.g., app).
For Value (or Target), enter `app.bubble.io (How to use custom domains in Bubble.io? | RapidDev)】. This is Bubble’s global domain that serves custom apps.
Save the record.
Ensure that both versions of your URL (with and without 'www') are properly configured to avoid technical issues during the setup process.
This approach essentially says app.yourdomain.com* is an alias of app.bubble.io*. Bubble (through its infrastructure) will resolve that to the correct IPs behind the scenes. This ensures that the correct IP addresses are generated and mapped behind the scenes, providing a seamless connection. This method can be helpful especially if you’re using Cloudflare or a DNS provider that supports CNAME flattening at the root (though here we are doing a subdomain, which is straightforward for CNAME).
Note: Some registrars (like certain configurations on GoDaddy) might not accept app.bubble.io for an ALIAS or ANAME record (for root domains (Issues with DNS records value app.bubble.io - Need help - Bubble Forum)】, but for subdomains, using a CNAME is usually fine. If you encounter issues adding a CNAME, you can fall back to using A records as in Option 1.
DNS Configuration Examples for Popular Providers
To give you more confidence, here are quick pointers for some popular DNS providers:
- GoDaddy: Go to your domain's DNS management. Click Add Record. If using A records, select A type, put Host = app and Points to = Bubble IP (repeat for all IPs). If using CNAME, select CNAME, put Name = app, Value = app.bubble.io. GoDaddy’s interface will auto-append your domain to the host name. Don't include the full domain in the Host field (just the subdomain part (Edit a subdomain | Domains - GoDaddy Help CA)】. Save changes.
- Namecheap: In Namecheap’s dashboard, find your domain and go to the Advanced DNS tab. Under Host Records, add a new record. Choose A Record, set Host to app and Value to the IP address. Click the checkmark to save. Add all the IPs as separate entrie (How can I set up an A (address) record for my domain? - Domains - Namecheap.com) (How can I set up an A (address) record for my domain? - Domains - Namecheap.com)】. For CNAME, you'd choose CNAME Record, Host app, and Value app.bubble.io. Remember to save.
- Cloudflare: If your domain is managed via Cloudflare, go to the DNS settings in your Cloudflare dashboard. Click Add Record. You can add either:Important: On Cloudflare, after adding the record(s), make sure the cloud icon is grey (DNS-only) for these Bubble records. If Cloudflare proxy (orange cloud) is enabled on records that already point to Cloudflare’s network (Bubble uses Cloudflare on their side), you can get a conflict (Cloudflare Error 1000 (Setting up custom domain with cloudflare - Need help - Bubble Forum)】. To avoid the “DNS points to prohibited IP” issue, set the Bubble subdomain DNS entries to DNS Only mode on Cloudflare. This ensures a smooth connection.
- Multiple A records for app pointing to each Bubble IP, or
- A single CNAME for app pointing to app.bubble.io.
Regardless of provider, once you've added the DNS records, double-check that you only have the intended records for that subdomain. Remove any old or default records that might conflict. For example, if there was an existing placeholder for "app" or a wildcard, delete those to prevent conflict (Setting up custom domain with cloudflare - Need help - Bubble Forum)】. Also ensure you haven't accidentally created duplicate records (like both an A and CNAME for "app" – you should use one method, not both, unless instructed otherwise).
After configuring the DNS, changes typically need time to propagate across the internet. Usually, it’s pretty quick (minutes to a couple of hours), but it can take up to 24-48 hours in some cases to fully update globall (Edit a subdomain | Domains - GoDaddy Help CA)】. During propagation, some users (or regions) may see the new site while others might not yet.
Step 4: Verify the Subdomain Connection (Propagation & Checking)
With DNS records in place, it’s time to verify that your Bubble.io subdomain is working. Here’s what to do:
- Use Bubble’s Checker: In your Bubble app’s Settings → Domain tab, there should be an option or indication to check domain status. It might automatically show a message like “DNS records incomplete” until it detects the correct configuration. Click “Check my settings” (or refresh the Bubble editor page after some time). Once Bubble sees the right DNS records, it will likely show a success message or turn green for that domain entry. Once the settings are complete, Bubble will show a success message indicating that your subdomain is correctly configured.
- Test in Your Browser: After giving some time for DNS propagation, try visiting your subdomain in a web browser: for example, go to https://app.yourdomain.com. (Use https in the URL because we expect SSL to be working; more on SSL in the next step.)
- If the domain is fully propagated and configured, you should see your Bubble application loading at that address! 🎉
- If you see a Bubble placeholder page or an error from Bubble saying “this domain is not yet configured,” it means Bubble hasn’t recognized the DNS changes yet – double-check your settings or give it a bit more time.
- If you get a browser error like “server not found” or “address could not be reached,” then the DNS changes might not have propagated or might be misconfigured – recheck the record entries for typos.
- If you get a Cloudflare error (like Error 1000 or 1014), see the Cloudflare note in Step 3 about turning proxy off – that’s a common f (Setting up custom domain with cloudflare - Need help - Bubble Forum)3】.
- DNS Lookup Tools: If things aren’t working and you want to confirm DNS propagation, use a tool like DNSChecker or WhatsMyDNS (online) to look up the records for app.yourdomain.com. You should see the IPs or CNAME you set. If they show up correctly across several locations, your DNS is propagated. If not, you may just need to wait a bit longer or you might spot a mistake in the records.
Patience is Key: DNS changes can take a varying amount of time. Bubble’s documentation notes that after you configure the domain, you might need to wait for those changes to propaga (Custom domain and DNS | Bubble Docs) (Edit a subdomain | Domains - GoDaddy Help CA)0】. While you wait, avoid repeatedly changing DNS settings (that can reset the propagation timeline). Instead, double-check everything is correct and then give it some time.
Once Bubble verifies the domain and your browser can reach the app on the subdomain, you’re almost done! The final piece to consider is SSL – ensuring your subdomain is secure.
Step 5: Ensure SSL (HTTPS) is Configured
Security is essential. We want https://app.yourdomain.com to work so that all traffic is encrypted. Fortunately, Bubble.io makes SSL extremely easy:
- Automatic SSL Certificates: Bubble uses Cloudflare and Let’s Encrypt to automatically provision SSL certificates for your custom domain. As long as your DNS is correctly pointed and the domain is connected in Bubble, **Bubble will take care of generating and installing the SSL certificate for your subdomain (How to use custom domains in Bubble.io? | RapidDev)7】. This usually happens behind the scenes once the domain is verified. In many cases, within minutes of the DNS being recognized, your site will start working with HTTPS. Without SSL, sensitive data transmitted between your users and your app could be exposed to potential security threats.
- SSL Settings in Bubble: As mentioned in Step 2, newer Bubble apps enforce SSL by default (you have no option to disable i (Custom domain and DNS | Bubble Docs)2】. If you have an older app and Bubble shows an option like “SSL on/off,” ensure it’s set to on (Bubble might have an “SSL Encryption” checkbox – it should be checke (How to create a subdomain to run Bubble app on - App Organization - Bubble Forum)5】.
- Force HTTPS: Bubble typically will serve your app on HTTPS by default once SSL is in place. If you try the HTTP version (http://app.yourdomain.com), Bubble (or Cloudflare) should redirect it to HTTPS. If you find that http is not redirecting, you might need to adjust settings – possibly enabling “Redirect all traffic to HTTPS”. Check Bubble settings or your Cloudflare (if used) SSL settings to enforce the redirect. But generally, Bubble handles this after SSL is active.
How do you know SSL is working? When you visit https://app.yourdomain.com, your browser should show a padlock icon indicating a secure connection. If you click it, it should show a valid certificate issued by Let’s Encrypt or Cloudflare for your domain. If you see a security warning or no padlock, give it a little more time and try again. Sometimes the certificate provisioning can lag slightly behind DNS propagation.
Troubleshooting SSL: In rare cases, Bubble might indicate it’s waiting to issue an SSL certificate. If 24 hours pass and you still don’t have HTTPS, consider the following:
- Ensure your DNS is 100% correct (SSL won’t issue if domain isn’t pointing properly).
- Ensure no conflicting AAAA (IPv6) records are present; those can confuse the che (Setting up custom domain with cloudflare - Need help - Bubble Forum)5】.
- As a last resort, you could remove the domain from Bubble and re-add it to trigger the process anew (not usually necessary).
The good news is, for most users, once the DNS is correct, SSL is a non-issue – it’s automatically there. Bubble’s use of Cloudflare means your app will benefit from SSL and even content delivery optimizations globally.
Step 6: Deploy and Test Your Bubble App on the Subdomain
By now, technically, you have created and connected your Bubble.io subdomain. The final step is to run your app on it and ensure everything is working as expected:
- Deploy to Live: If you haven’t already, deploy your Bubble app to the Live version (Bubble apps have Development and Live modes). Custom domains serve the Live version by default. In the Bubble editor, click the Deploy button to push your latest build to Live.
- Test the Live Site: Visit https://app.yourdomain.com in a browser. You should see your live Bubble app. Click around and make sure all pages load. If you had any workflows or links that pointed to the old bubbleapps.io domain, update them to use relative links or the new domain as needed.
- Development Version: If you want to access the development version on your custom domain, Bubble typically lets you do so by adding /version-test to the URL, e.g., `https://app.yourdomain.com/version-test/page-nam (Custom domain and DNS | Bubble Docs)4】. This should mirror what you see in preview mode. However, Bubble may also continue to allow the bubbleapps.io URL for development. (As Bubble’s docs note, once the domain is set, they redirect the bubbleapps.io address to your custom domain for both Live and Development mod (Custom domain and DNS | Bubble Docs)3】.)
- Check SEO and Links: Having your Bubble app on a custom subdomain is great for SEO and user trust. Make sure to update any external links or bookmarks that might still be pointing to the old URL. Also, if you use social login or OAuth in your app, update the authorized domains in those services to include your new subdomain.
- Email Configuration (if applicable): If you plan to send emails from your domain (like using Bubble’s email features or Postmark/SendGrid), adding SPF or DKIM records might be needed. This is outside our main focus, but just note that adding a subdomain for your app doesn’t directly affect email on your root domain. You might still want to configure email DNS records separately for deliverability, if needed.
- Stripe Integration: If your app involves payment processing, ensure that Stripe is correctly integrated and that webhooks are set up to handle transactions and notifications.
- Stripe Webhook: Setting up a Stripe webhook is crucial for integrating Stripe's payment processing features with your app. This facilitates the seamless transfer of data between Stripe and your application, ensuring that both test and live environments are managed effectively for data handling and automation.
Everything should now be up and running. You have successfully created and are running your Bubble.io app on a subdomain of your own domain! In a short time, you’ve gone from the default Bubble URL to a polished custom address.
Before we conclude, let’s address some common issues people face and how to troubleshoot them, in case you hit a snag.
Troubleshooting Tips and Common Issues
Even with the careful step-by-step approach, DNS and domain setups can sometimes be tricky. Here are some troubleshooting tips if your Bubble.io subdomain isn’t working as expected:
- Domain Not Updating on Bubble: If Bubble’s interface still says the domain isn’t correct after several hours, re-check the DNS entries. Did you enter the host name correctly (just the subdomain part, like “app”)? Is the domain name spelled correctly everywhere? Bubble will not recognize the domain if there’s a typo or if the records are on a different domain by mistake.
- DNS Propagation Delays: It might simply be that the DNS changes haven’t fully propagated. You can use a site like [LINK 1] to see if your new A/CNAME records have spread worldwide. If not, just wait a bit more. Most changes propagate within an hour or two, but some can indeed take up to 24 hours or more (especially if TTL was high or the registrar is slow to update).
- Conflicting DNS Records: A common issue is having old DNS records that interfere. For example, if you previously had a wildcard CNAME or an A record for the subdomain, those might conflict. Remove any unnecessary DNS records for the subdomain. Also, if your domain had an AAAA record (for IPv6) set by default, Bubble might flag that as not part of their configurati ([LINK 2])5】. You can safely delete AAAA records for your subdomain (and even for the root, if you’re pointing root elsewhere) when using Bubble, since Bubble doesn’t provide IPv6 addresses at this time.
- Cloudflare Specific Issues: If you’re using Cloudflare and see an Error 1000: DNS points to prohibited IP or Error 1014, this is because Cloudflare doesn’t allow pointing to Cloudflare IPs while proxying (it sees it as a potential circular reference). The solution is to go into Cloudflare DNS settings and set the Bubble subdomain records to **“DNS Only” (grey cloud) ([LINK 3])3】. This removes the proxy on those records and should resolve the error. You still get SSL through Bubble’s Cloudflare integration, so it’s fine to not proxy at Cloudflare level.
- SSL Not Working: If HTTP works but HTTPS doesn’t (or shows “Not Secure”), double-check that SSL is enabled on Bubble’s side. If yes, it might be that the certificate is still being issued. You can try the “Check my settings” button again in Bubble; sometimes that triggers a re-check for SSL. Also ensure your subdomain DNS had time to propagate before Bubble attempted to issue the SSL – if Bubble tried too soon, it might have failed and will retry. Usually, waiting and ensuring DNS is correct fixes this. Bubble will automatically provide the SSL certifica ([LINK 4][LINK 5][LINK 6])7】; there’s no manual certificate to install.
- “You’ve pointed [LINK 7] to Bubble, but we don’t have an app for this domain”: This error (or similar) can occur if you set up the DNS correctly but did not deploy your app to live or if the domain is not actually added in Bubble’s settings. Make sure the domain is listed in your Bubble app settings and spelled right. Also, if you have multiple Bubble apps, confirm you added the domain to the correct app! It’s an easy mix-up if you’re working with many projects.
- Switching Domains or Subdomains: If you decided to change the subdomain (for example, from [LINK 8] to [LINK 9]), you need to update it in Bubble (by deleting the old domain and adding the new on ([LINK 10])8】 and then adjust DNS accordingly. Always remove the old DNS records afterward to keep things clean. Bubble may cache a redirect, so if you removed a domain, you might have to clear your browser cache or wait a bit as we ([LINK 11])7】.
- One App, Multiple Subdomains Need: As noted earlier, Bubble doesn’t natively support running the same app on multiple custom domains or subdomains simultaneously. If you find yourself needing this (for example, [LINK 12] and [LINK 13] for the same Bubble app), you’ll hit a limitation. You might need Bubble’s dedicated sub-app feature or a third-party plugin/service. A plugin like SaaSAlias has been mentioned in the Bubble community for managing multiple domains within one Bubble app, but that is an advanced use case beyond straightforward set ([LINK 14])1】.
- Ask the Community or Support: If you’re stuck, Bubble’s forum is a great resource. Many users have likely had similar issues. You can search the Bubble forum or ask a question there. The Bubble documentation and tutorials (like Bubble’s own domain setup gui ([LINK 15])7】) can also provide help. And of course, Bubble support is there if something seems wrong on Bubble’s end.
- We recommend using community resources like the Bubble forum to seek advice and solutions for any issues you encounter during the setup process.
- One important thing to remember is to test your privacy rules thoroughly to ensure user data protection and compliance with regulations like GDPR.
- Using a regex to sanitize subdomain input is crucial in automating sub-domain generation.
- Domain Not Updating on Bubble: If Bubble’s interface still says the domain isn’t correct after several hours, re-check the DNS entries. Did you enter the host name correctly (just the subdomain part, like “app”)? Is the domain name spelled correctly everywhere? Bubble will not recognize the domain if there’s a typo or if the records are on a different domain by mistake.
- DNS Propagation Delays: It might simply be that the DNS changes haven’t fully propagated. You can use a site like dnschecker.org to see if your new A/CNAME records have spread worldwide. If not, just wait a bit more. Most changes propagate within an hour or two, but some can indeed take up to 24 hours or more (especially if TTL was high or the registrar is slow to update).
- Conflicting DNS Records: A common issue is having old DNS records that interfere. For example, if you previously had a wildcard CNAME or an A record for the subdomain, those might conflict. Remove any unnecessary DNS records for the subdomain. Also, if your domain had an AAAA record (for IPv6) set by default, Bubble might flag that as not part of their configurati (Setting up custom domain with cloudflare - Need help - Bubble Forum)5】. You can safely delete AAAA records for your subdomain (and even for the root, if you’re pointing root elsewhere) when using Bubble, since Bubble doesn’t provide IPv6 addresses at this time.
- Cloudflare Specific Issues: If you’re using Cloudflare and see an Error 1000: DNS points to prohibited IP or Error 1014, this is because Cloudflare doesn’t allow pointing to Cloudflare IPs while proxying (it sees it as a potential circular reference). The solution is to go into Cloudflare DNS settings and set the Bubble subdomain records to **“DNS Only” (grey cloud) (Setting up custom domain with cloudflare - Need help - Bubble Forum)3】. This removes the proxy on those records and should resolve the error. You still get SSL through Bubble’s Cloudflare integration, so it’s fine to not proxy at Cloudflare level.
- SSL Not Working: If HTTP works but HTTPS doesn’t (or shows “Not Secure”), double-check that SSL is enabled on Bubble’s side. If yes, it might be that the certificate is still being issued. You can try the “Check my settings” button again in Bubble; sometimes that triggers a re-check for SSL. Also ensure your subdomain DNS had time to propagate before Bubble attempted to issue the SSL – if Bubble tried too soon, it might have failed and will retry. Usually, waiting and ensuring DNS is correct fixes this. Bubble will automatically provide the SSL certifica (How to use custom domains in Bubble.io? | RapidDev)7】; there’s no manual certificate to install.
- “You’ve pointed app.bubble.io to Bubble, but we don’t have an app for this domain”: This error (or similar) can occur if you set up the DNS correctly but did not deploy your app to live or if the domain is not actually added in Bubble’s settings. Make sure the domain is listed in your Bubble app settings and spelled right. Also, if you have multiple Bubble apps, confirm you added the domain to the correct app! It’s an easy mix-up if you’re working with many projects.
- Switching Domains or Subdomains: If you decided to change the subdomain (for example, from app.yourdomain.com to portal.yourdomain.com), you need to update it in Bubble (by deleting the old domain and adding the new on (Custom domain and DNS | Bubble Docs)8】 and then adjust DNS accordingly. Always remove the old DNS records afterward to keep things clean. Bubble may cache a redirect, so if you removed a domain, you might have to clear your browser cache or wait a bit as we (Custom domain and DNS | Bubble Docs)7】.
- One App, Multiple Subdomains Need: As noted earlier, Bubble doesn’t natively support running the same app on multiple custom domains or subdomains simultaneously. If you find yourself needing this (for example, app.yourdomain.com and members.yourdomain.com for the same Bubble app), you’ll hit a limitation. You might need Bubble’s dedicated sub-app feature or a third-party plugin/service. A plugin like SaaSAlias has been mentioned in the Bubble community for managing multiple domains within one Bubble app, but that is an advanced use case beyond straightforward set (How to route two different Bubble apps to different sub domains?)1】.
- Ask the Community or Support: If you’re stuck, Bubble’s forum is a great resource. Many users have likely had similar issues. You can search the Bubble forum or ask a question there. The Bubble documentation and tutorials (like Bubble’s own domain setup gui (Trying to connect domain to my app - Need help - Bubble Forum)7】) can also provide help. And of course, Bubble support is there if something seems wrong on Bubble’s end.
- We recommend using community resources like the Bubble forum to seek advice and solutions for any issues you encounter during the setup process.
- One important thing to remember is to test your privacy rules thoroughly to ensure user data protection and compliance with regulations like GDPR.
Keep in mind, once configured, the domain setup generally doesn’t need ongoing tinkering. It should just work. If you don’t see your app at all, retrace the steps: domain in Bubble, DNS records in registrar, wait for propagation, check Bubble for confirmation, test HTTPS. With those steps covered, most issues can be resolved.
Now that we’ve addressed troubleshooting, let’s wrap up what we’ve learned.
FAQs (Frequently Asked Questions)
Q1: Do I need a paid Bubble.io plan to use a custom subdomain?
A: Yes. Custom domains (whether root domains or subdomains) are a feature for paid Bubble plans. The free Bubble plan only lets you use the bubbleapps.io domain. You’ll need to upgrade to at least the Personal plan to connect how to quickly create and run a Bubble.io subdomain on your own doma (How to use custom domains in Bubble.io? | RapidDev)1】. Once on a paid plan, you can add your domain or subdomain in the app settings as we did above.
Q2: Does it cost extra to create a subdomain?
A: No, creating a subdomain itself does not cost extra. Once you own a domain name, you can create subdomains under it freely via DNS settin (Custom domain and DNS | Bubble Docs)3】. Bubble.io also does not charge extra for using a custom domain (aside from requiring the appropriate plan). The only cost is your domain registration and your Bubble plan.
Q3: My main website is on the root domain (example.com). Can I run my Bubble app on a subdomain without affecting the main site?
A: Absolutely! This is a common scenario. You can have www.yourdomain.com (or yourdomain.com) hosting your main site (perhaps on another platform or server) and use, say, app.yourdomain.com for your Bubble app. The DNS entries for the subdomain won’t interfere with the root domain’s website. Just make sure the subdomain DNS is pointing to Bubble, and leave your root domain’s DNS as is for your main site. Users visiting the subdomain will get your Bubble app, and users visiting the main domain will get your main website.
Q4: Bubble gave me multiple IP addresses. Do I need to add all of them as A records?
A: Yes, if you are using the A record method, add every IP address that Bubble provided for the subdomain. Bubble uses multiple IPs for redundancy and load balanci (Custom domain and DNS | Bubble Docs)0】. Adding all the A records ensures your subdomain will resolve even if one of the IPs is down or if traffic needs distribution. If you choose to use a CNAME to app.bubble.io instead, that CNAME will ultimately resolve to multiple IPs automatically.
Q5: How long does it take to quickly create and run a Bubble.io subdomain?
A: The process of setting up is quite quick – you can configure everything in maybe 15-30 minutes. The longest part is often waiting for DNS propagation, which can take a bit of time (often a couple of hours or less, but up to 48 hours in worst case). In many cases, users see their site live on the new subdomain within an hour of adding the records. So, you can quickly create the subdomain and do the setup, but “run” might involve a short waiting period. Overall, it’s usually a same-day task from start to finish.
Q6: Will my Bubble app’s old URL (myapp.bubbleapps.io) still work after I set the subdomain?
A: Once your custom domain/subdomain is properly configured, Bubble will redirect the old .bubbleapps.io URL to your new doma (Custom domain and DNS | Bubble Docs)3】. This means if someone tries the old link, they should be forwarded to the new subdomain. However, it’s best to update any references to the old URL and start using the new one in all your communications and marketing. For development (version-test) you might still use the Bubble URL or the new domain with /version-test.
Q7: I use Cloudflare for my domain’s DNS. Anything special I should do?
A: As covered in the guide, if using Cloudflare, set the DNS records for your Bubble subdomain to DNS Only. You can still take advantage of Cloudflare for other aspects of your domain, but for the Bubble subdomain, Bubble/Cloudflare will handle the CDN and SSL. By making it DNS Only, you avoid Cloudflare interfering or causing a confli (Setting up custom domain with cloudflare - Need help - Bubble Forum)3】. Also, ensure no Page Rules or other settings are redirecting or altering the subdomain. Once set up correctly, it works smoothly with Cloudflare.
Q8: How do I remove or change my subdomain later if I need to?
A: In Bubble, you can go to Settings → Domain and click “Delete this domain name” (or similar) to remove the custom domain connecti (Custom domain and DNS | Bubble Docs)8】. Your app will revert to the bubbleapps.io URL. You should also remove the DNS records you added in your domain’s DNS to avoid confusion. If you want to switch to a different subdomain or domain, you would then add the new one in Bubble (as we did in Step 2) and update DNS accordingly. Keep in mind that DNS changes might take time, and if you switch domains, users going to the old subdomain will no longer find your app (unless you set up some redirect on your own).
- Sort and organize your DNS records and subdomains to ensure a clean and efficient setup, avoiding any potential conflicts or confusion.
These FAQs cover the common queries. If you have a different question, chances are someone on the Bubble forum has asked it, or you can consult Bubble’s documentation for more details.
Conclusion
Setting up a custom subdomain for your Bubble.io app might sound technical, but as we've shown in this step-by-step guide on how to quickly create and run a Bubble.io subdomain, it’s quite straightforward. To recap, you learned how to add your subdomain in Bubble, configure your DNS records on popular platforms, enable SSL, and verify everything is working. You’ve essentially taken your app from a generic Bubble URL to a polished app.yourdomain.com address, which is a big step for branding and professionalism.
By following best practices and the tips provided (and armed with some troubleshooting know-how), you ensured a smooth setup. Your Bubble application is now seamlessly integrated with your own domain, giving your users a trusted and memorable link to access your app. Plus, with Bubble and your DNS provider handling the heavy lifting (like DNS routing and SSL certificates), maintenance is minimal. However, using a domain name that incorporates 'bubble' for a custom domain is not permitted as it violates Bubble's terms of service.
In the spirit of an optimistic, informative tone: Congratulations! You have successfully created and are running your Bubble.io app on a subdomain. This opens the door for you to confidently share your app with the world, knowing it’s on a solid foundation. Whether you're running a startup MVP, a client project, or your own passion project on Bubble, using a custom subdomain will enhance your app’s credibility and user experience.
Now that your Bubble.io subdomain is up and running, you can focus on what matters most – building and improving your app – while enjoying the benefits of a proper custom domain setup. Happy Bubbling on your new subdomain, and best of luck with your application’s success!
Sources:
- Bubble.io Manual – *Custom domain and DN (Custom domain and DNS | Bubble Docs) (Custom domain and DNS | Bubble Docs) (Custom domain and DNS | Bubble Docs) (Custom domain and DNS | Bubble Docs)2】
- Bubble Forum – Tips on subdomain setup and DNS recor (How to create a subdomain to run Bubble app on - App Organization - Bubble Forum) (Setting up custom domain with cloudflare - Need help - Bubble Forum)2】
- Rapid Dev Blog – Using custom domains in Bubble.io (step-by-step guid (How to use custom domains in Bubble.io? | RapidDev) (How to use custom domains in Bubble.io? | RapidDev)7】
- GoDaddy Support – *How to create a subdomain (DNS records (What is a subdomain and how to create a subdomain? - GoDaddy Resources - Asia)4】 (example for adding DNS records)
- Medium (T. Treacher) – *Bubble.io and Cloudflare setu (Bubble.io and Cloudflare. Set up cloudflare with bubble.io | by Toby Treacher | Medium)3】 (CNAME alias method)
Introduction to Bubble.io
Bubble.io is a powerful no-code platform that allows you to build web applications without writing a single line of code. Whether you’re a startup founder, a freelancer, or a business owner, Bubble empowers you to create fully functional web apps quickly and efficiently. With its intuitive drag-and-drop interface, you can design complex workflows, integrate with external APIs, and manage your app’s database with ease. For specialized assistance and Bubble solutions, Sidetool offers tailored services to help rapidly iterate and scale your projects.
One of the standout features of Bubble is its flexibility. You can build anything from simple landing pages to complex marketplaces and SaaS platforms. Bubble handles the heavy lifting of server management, security, and scalability, so you can focus on building and improving your app. Plus, with a vibrant community and extensive documentation, you’ll have plenty of resources to help you along the way.
Understanding Domain Structure
Before diving into setting up a subdomain for your Bubble app, it’s essential to understand the basics of domain structure. A domain name is your website’s address on the internet, like yourdomain.com. It’s composed of two main parts: the root domain and the top-level domain (TLD). For example, in yourdomain.com, “yourdomain” is the root domain, and “.com” is the TLD.
A subdomain is an extension of your root domain, used to organize and navigate to different sections of your website. Think of your domain as a house and subdomains as rooms within that house. For instance, app.yourdomain.com is a subdomain where “app” is the subdomain prefix. Subdomains are useful for separating different parts of your site, such as a blog (blog.yourdomain.com) or a support center (support.yourdomain.com).
DNS (Domain Name System) is like the phonebook of the internet, translating domain names into IP addresses so browsers can load internet resources. When you set up a subdomain, you’ll configure DNS records to point to the correct server, ensuring users can access your Bubble app seamlessly.
Building a Bubble App
Building an app on Bubble.io is a straightforward process, thanks to its user-friendly interface and powerful features. Here’s a brief overview of the key steps involved:
Sign Up and Create a New App: Start by signing up for a Bubble account. Once logged in, click on “New App” to create your project. You’ll be prompted to enter a name and choose a template or start from scratch.
Design Your App: Use Bubble’s drag-and-drop editor to design your app’s user interface. You can add elements like buttons, text, images, and forms. Customize the layout and style to match your brand.
Set Up Workflows: Workflows are the backbone of your app’s functionality. They define what happens when users interact with your app. For example, you can create workflows to handle user sign-ups, form submissions, and data processing.
Manage Your Database: Bubble provides a built-in database to store and manage your app’s data. You can create data types, fields, and entries, and use them in your app’s workflows and elements.
Test and Deploy: Before going live, thoroughly test your app to ensure everything works as expected. Use Bubble’s preview mode to simulate user interactions. Once you’re satisfied, deploy your app to the live environment.
With these steps, you can build a fully functional web app on Bubble.io without any coding knowledge. The platform’s extensive features and integrations make it a powerful tool for bringing your ideas to life.
Best Practices for Subdomain Management
Managing subdomains effectively is crucial for maintaining a secure, efficient, and user-friendly web presence. Here are some best practices to keep in mind:
Security: Ensure your subdomains are secure by enabling SSL (HTTPS) for encrypted connections. Bubble.io provides automatic SSL certificates, but it’s essential to verify that your subdomain is properly configured and secure.
SEO: Subdomains can impact your site’s SEO. Ensure that your subdomain content is relevant and high-quality. Use descriptive subdomain names and optimize your content for search engines to improve visibility.
Consistency: Maintain a consistent user experience across your subdomains. Use similar design elements, navigation, and branding to create a cohesive look and feel.
Monitoring and Maintenance: Regularly monitor your subdomains for performance and security issues. Keep your DNS records up to date and remove any unused or outdated subdomains to avoid confusion and potential security risks.
Documentation: Document your subdomain setup and management processes. This will help you and your team understand the structure and make future updates easier.
By following these best practices, you can ensure that your subdomains are well-managed, secure, and optimized for both users and search engines.
Conclusion and Next Steps
Congratulations! You’ve successfully learned how to quickly create and run a Bubble.io subdomain. By following this step-by-step guide, you’ve set up your subdomain, configured DNS records, enabled SSL, and deployed your Bubble app. Your app is now running on a custom subdomain, enhancing your brand’s professionalism and user experience.
As you move forward, continue to monitor and maintain your subdomain to ensure optimal performance and security. Explore Bubble’s extensive features and integrations to further enhance your app. And don’t forget to stay engaged with the Bubble community for support, tips, and inspiration.
Now that your Bubble.io subdomain is up and running, you can focus on what matters most – building and improving your app. Happy Bubbling, and best of luck with your application’s success!
Setting Up a Custom Domain
When launching a Bubble app, setting up a custom domain is a crucial step to make your app more recognizable and professional-looking. A custom domain is a unique domain name that is used to access the app, and it can be purchased from a domain registrar for a few dollars, typically between $10 to $20.
To set up a custom domain, you’ll need to navigate to the Domain/email sub-tab in your Bubble app and enter the purchased domain name in the Domain name input. Bubble will then provide the DNS records that need to be registered with the domain registrar, which is a fundamental part of the DNS setup process.
The DNS records, including A records, will map the domain name to its corresponding IP address, allowing users to access the app. It’s essential to understand that the DNS setup process can take some time, typically up to 24 hours, but usually, results are seen after 2-4 hours, depending on the propagation time.
During this time, the new DNS settings need to propagate across the internet, which is a necessary process to update local copies of DNS records. This propagation ensures that when users type your custom domain into their browsers, they are directed to your Bubble app.
By following these steps, you can set up a custom domain for your Bubble app, enhancing its professionalism and making it easier for users to access.